A Master Detail Interface is a common pattern in computer systems where a master list is displayed, and when an item is selected, more details about that item are displayed in a separate view.
| Master | Detail |
|---|---|
 |
 |
On this tutorial we’ll create all components for a clean master/detail implementation:
- ./src/pages/
- contacts
- contact-details
- ./src/models/contact.interface.ts
- ./src/providers/contacts/
- contacts.service.ts
- contacts.service-mock.ts
- mock-contacts.ts
If you’re not familiar with Ionic 2 already, I’d recommend reading my previous tutorial Getting Started with Ionic to get up and running.
Generate pages posts-list and post-details
We’ll use ionic generate on this tutorial to create required components.
$ ionic g page contacts --no-modules
$ ionic g page contact-details
We don’t provide module for the contacts page to simplify our app, but could remove the option if you prefer using lazy-loading.
Generate data provider and mockup
$ ionic g provider contacts
$ cp src/providers/contacts/contacts.ts src/providers/contacts/contacts.service-mock.ts
$ mv src/providers/contacts/contacts.ts src/providers/contacts/contacts.service.ts
Ionic provider generator automatically add ContactsProvider on app.module.ts.
So, after renaming the files, we should update the path.
Using Angular 2 barrels
To allow switching of service (mock vs regular) easily we’ll use angular barrels.
We create an src/providers/contacts/index.ts file where we reference the current Service to use:
//export * from './contacts.service';
export * from './contacts.service-mock';
And we replace on app.module.ts the import import { ContactsProvider } from '../providers/contacts/contacts.service-mock' to import { ContactsProvider } from '../providers/contacts/';
And add same import on pages/contacts/contacts.ts.
Mock Content
src/providers/contacts/mock-contacts.ts
let contacts = [
    {
        id: "6",
        firstName: "Miriam",
        lastName: "Aupont",
        title: "Senior Broker",
        landlinePhone: "617-244-3672",
        mobilePhone: "617-244-3672",
        email: "miriam@ionicrealty.com",
        picture: "https://s3-us-west-1.amazonaws.com/sfdc-demo/people/miriam_aupont.jpg"
    },
    {
        id: "7",
        firstName: "Michelle",
        lastName: "Lambert",
        title: "Senior Broker",
        landlinePhone: "617-244-3672",
        mobilePhone: "617-244-3672",
        email: "michelle@ionicrealty.com",
        picture: "https://s3-us-west-1.amazonaws.com/sfdc-demo/people/michelle_lambert.jpg"
    },
    {
        id: "8",
        firstName: "Victor",
        lastName: "Ochoa",
        title: "Senior Broker",
        landlinePhone: "617-244-3672",
        mobilePhone: "617-244-3672",
        email: "victor@ionicrealty.com",
        picture: "https://s3-us-west-1.amazonaws.com/sfdc-demo/people/victor_ochoa.jpg"
    }
];

export default contacts;
Stop using observable, just use promise
We’ll consider on this tutorial the use case we just need to GET data from the server and display the data. When you have a single event, just use promise! I recommend the reading of Angular — Stop using observable when you should use a promise to understand this topic.
import { Injectable } from '@angular/core';
import { Http } from '@angular/http';
import 'rxjs/add/operator/map';
import 'rxjs/add/operator/toPromise';

@Injectable()
export class contactsProvider {

    findAll() {
        return this.http.get("https://jsonplaceholder.typicode.com/posts")
          .map(res => res.json())
          .toPromise();
    }

    findById(id) {
        return this.http.get(`https://jsonplaceholder.typicode.com/posts/${id}`)
          .map(res => res.json())
          .toPromise();
    }
}
If you are interested in comparing both strategies Observable vs Promise I recommend the reading of following post Fetching Data In Angular2.
Import HttpModule
As we use http on our provider we have to import HttpModule on app.module.ts
import { HttpModule } from '@angular/http';
...
@NgModule({
  declarations: [
...
  ],
  imports: [
    BrowserModule,
    HttpModule,
    IonicModule.forRoot(MyApp)
  ],
  ...
Create model contact
We can use the ionic generator but it will create a folder for each model and doesn’t seem useful, then I prefer to create manually src/models/contact.interface.ts
export interface Contact {

  picture: string,
  firstName: string,
  lastName: string,
  title: string,
  landline: string,
  mobilePhone: string,
  email: string
}
Views
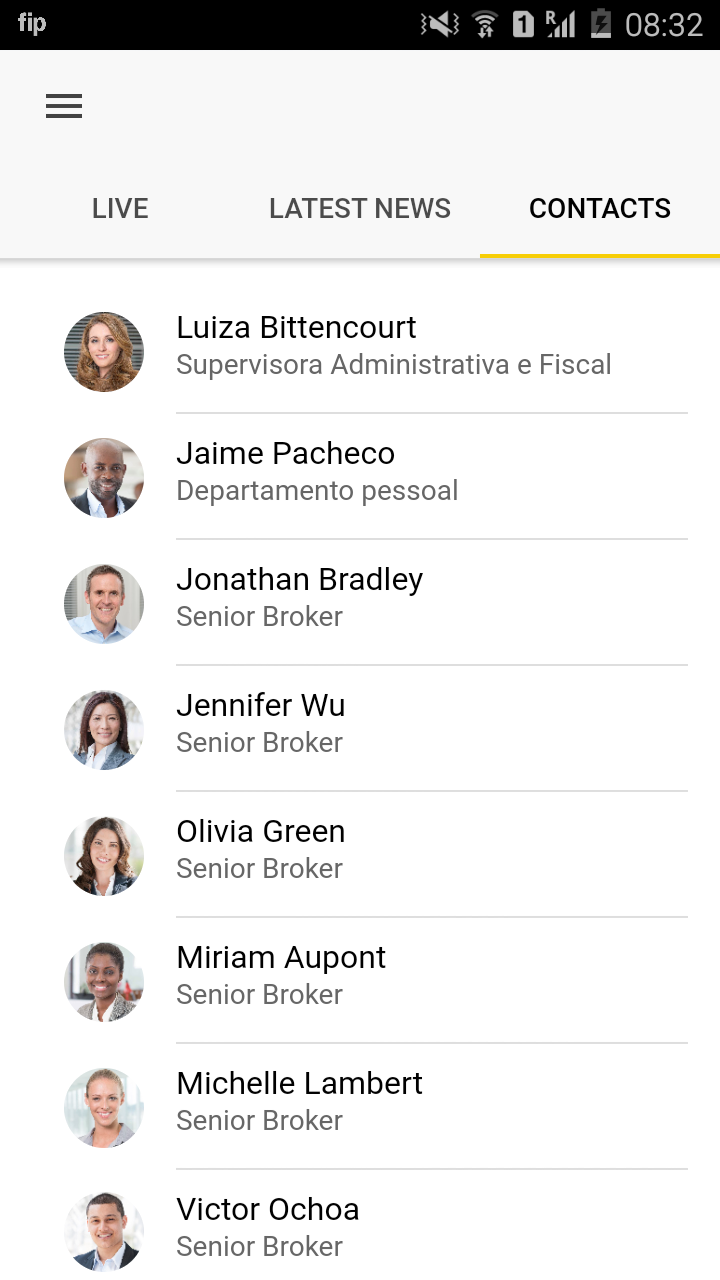
Contacts
See below an example of view to render list of contacts inspired by DreamHouse Project of Christophe Coenraets.
  <ion-list>
    <button ion-item *ngFor="let contact of contacts" (click)="pushDetailsPage('contact/details/', contact.id)">
      <ion-avatar item-left *ngIf="contact.picture; else anonymous">
          <img src=""/>
      </ion-avatar>
      <ng-template #anonymous>
          <ion-avatar item-left>
              <ion-icon style="font-size: 3.0em" name="contact"></ion-icon>
          </ion-avatar>
      </ng-template>

      <h2> </h2>
      <p></p>
    </button>
  </ion-list>
Contact details
src/pages/contact-details/contact-details.ts
<ion-content class="contact">

  <ion-card>

    <ion-card-content>
      <img src="" />
      <h2> </h2>
      <h3></h3>
    </ion-card-content>

    <ion-list>
      <a href="tel:" ion-item>
        <ion-icon name="call" item-left></ion-icon>
        <p>Call Office</p>
        <h2></h2>
      </a>
      <a href="tel:" ion-item>
        <ion-icon name="call" item-left></ion-icon>
        <p>Call Mobile</p>
        <h2></h2>
      </a>
      <a [href]="'sms:' + contact.mobilePhone" ion-item>
        <ion-icon name="text" item-left></ion-icon>
        <p>Text</p>
        <h2></h2>
      </a>
      <a href="mailto:" ion-item>
        <ion-icon name="mail" item-left></ion-icon>
        <p>Email</p>
        <h2></h2>
      </a>
    </ion-list>

  </ion-card>

</ion-content>
src/pages/contact-details/contact-details.scss
page-contact-details {
  .contact {
    ion-card {
      margin-top: 100px;
      overflow: visible;
      ion-card-content {
        background-color: map-get($colors, primary);
        color: #424242;
        text-align: center;
        padding-bottom: 28px;
        img {
          height: 160px;
          width: 160px;
          border-radius: 50%;
          margin-top: -100px;
          border: solid 4px #FFFFFF;
          display: inline;
        }
        h2 {
          font-size: 2.5rem;
          margin-top: .5rem;
        }
        h3 {
          font-size: 1.8rem;
        }
      }
    }
  }
}
Furthermore
- ionic-starter-super includes a list-master and item-detail pages
